Monday, July 30, 2012

Princess Carriage Cake Pops

Princess Carriage Pops  

With a sprinkling of fairy dust and a whisper of imagination . . . 

 these plump little cake pops turned into a royal carriage fit for a princess.
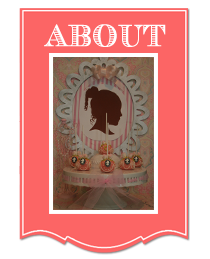
This silhouette, of one very special princess, was my inspiration for creating these magical cake pops. 
If you are interested in where I got this done or would like one of your own prince or princess please click here silhouette .

 I started off with a basic white cake recipe.  Baked it, cooled it, crumbled it.
 Added two large scoops of buttercream icing.
Mixed to the consistency of a truffle: moist but not wet.
 Rolled out six heaping scoopfuls into smooth rounds.
Now we're rolling!  Even added some pearlized dusting. Its starting to come together now.
Until one of my wheels went flat and my rosettes looked more like tire valves.  I'm pretty sure the Princesses would not dig valves.  So back to the drawing board
Piping on the swirled carriage wheels felt better, at least until my fondant skills improve!  

Added some vines and royal icing roses.
 The Princess' initial in the middle and . . .

But wait . . . I have these little cameos that would fit perfectly.
and . . . Viola!


Tres magnifique!

Le petit gateau!  (That's little cake)

 Something about these just makes me want to speak French!

Or take a trip to Paris.

So what did the Princess think?
Princess approved!

Wednesday, July 25, 2012

Circus Animal Cake Pops

Animal Cake Pops
Lions, Elephants, Bears . . . Oh my!!!  Well, ok there weren't any tigers in this set of icing decorations but there sure was a roaring ton of cuteness inside.  
I'm thinking Circus Birthday Party?  A day out at the zoo?  Neutral themed baby shower?
These were so easy to make I just had to share them with you.  So here is a photo-play-by-play.
Start with a pack of these adorable icing decorations by Wilton.  I bought mine at Michaels craft store but you can find them at places online like shopbakersnook.com.
Roll out your mixture of baked cake and icing with your trusty ice cream scooper.
This Mickey Mouse one rocks!
Melt your candy discs in the microwave on low.  Stir and add a dollop of shortening if too thick.
Dip the candy sticks about an inch in.
Gently push sticks in about halfway through cake ball.  Pop into the freezer for 10 mins. to secure sticks.
Then dip into melted candy coating.
Push party hat in gently at an angle.
Carefully press the animal face onto the front side of cake pop.
Continue on until you have a sweet little animal herd smiling up at you.
I hope you enjoy these as much as my little munchkins do.
More cake pop adventures to come every week.  I'd love to know what you think so please leave your comments!